Wednesday, October 26, 2011

A New Rhythm

Sorry for the unexpected delay in posts, life has been hectic lately! I am officially done working (for now), and today is the first official day that I am unemployed. It is a strange feeling. I went to the grocery store this morning and did the shopping for the next few days meals, did some cleaning up at home, and plan on doing more of that in a little while. Saturday was my birthday, which was filled with family and love, just the way I like it! I got to go down to the market and to the library and in general had a lovely relaxing day at home.

My biggest challenge over this next period of being home is going to be learning to slow down. When I went out today, I found myself trying to rush, looking at the clock, and not enjoying my errands. I then consciously went and got into one of the longer lineups at the cashiers in order to remind myself that I was not in a hurry and I could just let time go by without thinking about it. It was nice. Today, I am cooking slowly- maple baked beans that will take a good 4 hours in the oven. I am going to relish in the slowness of the meal, and while it is cooking I am going to do some reading, take some time for knitting, and do as much cleaning as I want. There is always tomorrow.


Maple baked beans, from the last time I made them.

The weather here is really starting to feel like winter. I needed gloves, a scarf, and a hat yesterday on campus, as the wind was very chilly. The trees on our road are vibrant oranges, yellows, and reds and when I drive down I can see them dancing behind me as they are stirred up off the ground. Today is grey and cloudy, and they actually were calling for snow overnight! I don't think it happened, but it is coming soon. I could smell the wood fires that were heating houses on the street this morning; oh how I miss a wood fire! I am going to make sure our first purchased home has a wood stove, I just love them. 

How have your days been lately?

Brenna

Sunday, October 9, 2011

Homemade Cranberry Sauce

This weekend is Thanksgiving here in Canada, and I could not be more excited! This holiday is one of my favourite and is the kick off for a great couple of months of family, good food, and lots and lots of time in the kitchen! I absolutely love Thanksgiving and everything it stands for. Thinking about everything in your life that is good, having a nice big family meal, and the beginning of fall! The past 2 years we have hosted the big dinner at our house, but unfortunately our new place is much too small to have 10 people over for dinner. Sigh. So this year D's parents are hosting, and we are bringing a few items to add to the menu. We have been put in charge of stuffing (my all time favourite part of the Thanksgiving and Christmas meals) and the cranberry sauce.


Happy Thanksgiving, eh?


Two years ago I made and canned my first ever cranberry sauce. Before that, I had only tasted the store-bought canned variety and thought it was just fine. Boy, I was soooo wrong! Once you have tasted homemade cranberry sauce, I guarantee you will never buy it again. My batch two years ago made about 6 or 7 jars and that lasted us until this year. Considering how easy it is to make and can, that is a great time investment! So, today I am making more. Here is the recipe:

8 cups whole cranberries, washed and picked through
4 cups sugar
1 cup orange juice*
3 cups water*
2 cinnamon sticks, broken ( or 1 tsp. ground cinnamon)
6 x 500 mL jars and lids

* you can also just juice one orange and then top it up with enough water to make 4 cups

Place juice, water, sugar, and cinnamon in a large pot. Bring to a boil and simmer for 5 minutes. Add cranberries and cook until skins have popped and sauce is thick and bright red. Pour into sterilized jars and seal. Process in water bath canner for 15 minutes. Cool for 24 hours and store on shelf.


If you are wondering how to sterilize and seal jars, please refer to my canning tutorial. You can sterilize any sized jar in the oven and follow the same method for heating the lids.


These make excellent gifts and really are one of the easiest recipes to make! Enjoy!

What is your Thanksgiving like? What are your traditional meal staples, if any?

Brenna

Saturday, October 8, 2011

Picking Grapes

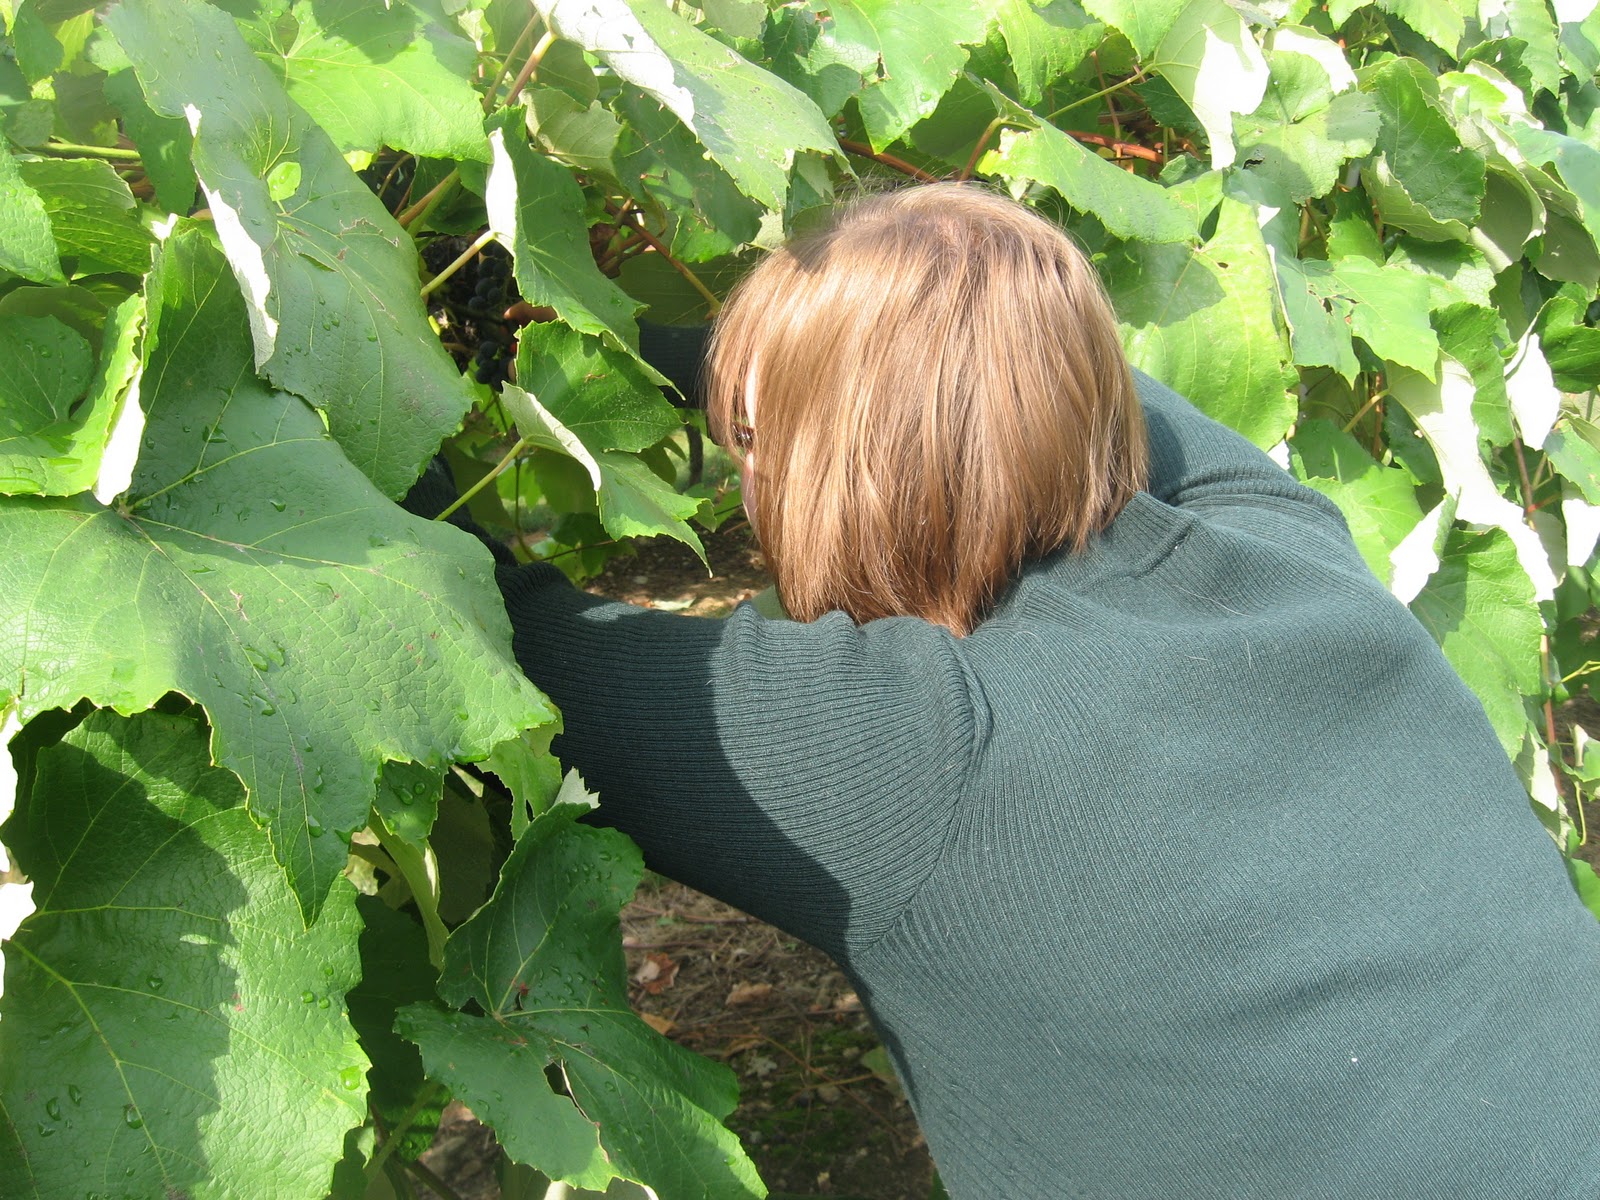
Last weekend we went to visit my family and got to pick grapes! My grandfather has been telling us about this orchard for the past 3 years, and we have tried to make it up there every summer for the past 2 years with no luck. The first year the road to their house was closed due to forest fires and last year D had some health issues that prevented us from traveling.  But this year we made it! It was a gorgeous day, and the grapes were everywhere! Here are some pictures from the day:


Hope you are all having a lovely weekend. I will be back with some Thanksgiving posts!

Brenna

Tuesday, October 4, 2011

A Change of Pace

Hello! We have just gotten back from a weekend away visiting my family. We went grape picking with my grandparents (more on that later!) and got in a great visit with my parents as well. However, when I was away I received notice that I will be laid off in 3 weeks due to my workplace having a financial crisis. I had a feeling this was coming from recent talks these past couple weeks, so I was not surprised, but definitely disappointed and a bit concerned. I have been working at this same job for the past 3 years and really have no experience outside of my field, which is veterinary reception. But, I have decided to take this as an opportunity to slow down a bit more and really think about what I want to do with my life's work. I am still going to school working towards my B.A., so that will continue, but until I can find another job I will have to change my lifestyle a bit to make up for the fact that my pay cheques will no longer be coming in.


Here are my plans:

1. Use public transit whenever possible to save gas (I pay for a pass in my tuition every semester, so I might as well use it!)

2. Frugal meals! This is already a staple in our household, but I will be extra conscious of using whatever we have on hand and trying to make as many freezer  based meals as possible. This also means no more eating out, no more buying bread, and making everything from scratch. I will also be relying on my canned goods and pantry to get us through rough patches.

3. Cut my cell phone down to the bare minimum. We do not have a land line and I have a contract so I cannot cut it out entirely, but there are some cheaper plans that I will be researching.

4. No more paying for tea/coffee. We have tons at home, I do not need to buy it.

5. Stay in! We hardly ever go out, but from now on it is cheap home entertainment.

6. Focus on my studies as much as possible, as this is the path to my success.

7. Write, every day. I am constantly making excuses as to why I don't write, but now I will have more spare time, so I need to dedicate myself to it. My last professor told me I have the talent to be a professional writer, and I need to hone my skills and get my creative juices flowing!

8. Enjoy this time! I need to realize that this has happened for a good reason and I need to embrace this stage in my life. I want to enjoy being at home and make myself relax and slow down more.

I will also be scouring Rhonda's blog for more tips on frugal living, as she really is the master of it.

I would appreciate anyone's input on this, and would love to hear your tips and tricks to frugal living! Have you ever been in a situation similar to mine? How did you manage?

Brenna

Thursday, September 29, 2011

Tutorial: How to Can Fruit

Recently I had a comment asking me to provide a step by step tutorial on canning fruit. Thank you for the request, Sam! I am happy to be providing this tutorial to you today. Every year for the past 3 years I have canned peaches and pears, and last year I also did apricots. This year I have done just the peaches and pears, as they are our favourites. Please keep in mind that I am by no means an expert or professional canner, I just do what I was taught by D's mom, and I have never had a jar not seal on me. Please follow every necessary precaution when canning food at home, as there is a small but dangerous risk of botulism if you do not sterilize and process correctly.

Ok, are you still with me? Canning is very simple once you understand the necessary steps. Yes, it is time consuming, so make sure you set aside at least a few hours per batch of 7 jars. Trust me, all of the work is completely worth it! Home canned fruit is delicious!

Today's tutorial will be pears, but peaches are very similar. Here we go!

Supplies Needed
1 canner with metal rack
Enough 1 litre jars with new lids to do the amount of fruit you have (Roughly about 10 jars for every 20 pounds of fruit)
Large pot to make syrup
A ladle
Small pot with lid to boil jar lids in
A large cookie sheet
A butter knife
A clean cloth
A magnetic stick to lift lids out of hot water (usually comes with other canning supplies)- or a fork/spoon
A vegetable peeler/knife
A cutting board
A sharp knife to slice fruit
Large bowl to put sliced fruit in

Ingredients
Pears- at least 7-8 pounds to make one batch (7 jars)
Water (tap is fine)
White Sugar (2 1/2 cups)
Lemons (optional)- 1 should do 7 jars

All of these supplies should be in your kitchen except for the canning supplies. I bought my canner for about $20 and the other stuff (magnetic stick, jar lifter) for less than $10. These are a worthwhile investment, as they will last many years and help make the process go by much faster.

To begin, fill your canner about halfway full of water and set it on a large element on medium high heat with the lid on. It always takes quite a while for that much water to come to a boil, so I do this first. Next, preheat your oven to 200 degrees F. Place all of the jars (cleaned in hot soapy water) and their rings on the cookie sheet and put in the oven. The heat will sterilize them, but they must be in there for a minimum of 20 minutes, so do this before starting to prepare the fruit.


Next make the sugar syrup that the pears will sit in. I make an "extra light" syrup, meaning it is not too sweet. I prefer this as it allows the flavour of the fruit to stand out but still provides enough sweetness. Put 11 cups of water into a large pot. Mix in 2 1/2 cups of sugar and place over medium heat to slowly come to a boil, stirring occasionally.


Now, begin to prepare the fruit. With peaches you can dunk them into boiling water to loosen the skins, but with pears they must be peeled by hand. Select fruit that is not overripe and has few blemishes. It does not matter how big they are. Peel and stem the pears and cut them into the size you desire. I quarter mine. Cut out the core and place slices into a cold water bath that has a bit of acid added to it (lemon juice, citric acid, or vinegar all work, only a couple teaspoons). This will prevent the slices from browning as you prepare the rest.

coring the pears

all sliced and ready to jar!

Now you must heat up the lids for the jars so that they are hot and ready to seal. All you have to to is put them in a pot and cover them with water. Bring them to a boil and let them boil for 2 minutes, then cover the pot and set it aside.


Once you have cut up all of your fruit, you are ready to start putting them in jars! Now I follow D's grandmother's recipe and add a slice of lemon into every jar. This is not necessary, it is purely optional. All it does is add a lovely lemon flavour to the pears. If you do not want to add the lemons, leave them out.


Remove one jar at a time from the oven (careful, they will be VERY hot!). Place one slice of lemon on the bottom (if using) and then begin layering the pear slices in the jar. If you place them all core side down they will stack much better and you will be able to fit many more slices in each jar. Fill the jar to the base of the lid, where the band will screw on to. 


Now it is time to add the hot syrup that has come to a boil. Carefully ladle in the syrup until it there is about a half inch of head space left in the jar.


Now you have to remove the air bubbles that may have formed between the slices of fruit when you were ladling in the syrup. Now every book that I have ever read has always warned against using a metal utensil to do this, as you risk cracking the jar. Well, I do it anyways, but if you want to be extra pre-cautious, use a plastic utensil. Simply run the knife down the four sides of the jar and wiggle it a little bit and you will see little air bubbles float to the surface. DO NOT force the knife down or wiggle it like crazy, or you probably will crack the jar!


Ok, now wipe the rim of the jar where the lid will sit to get any sticky syrup off it, which will cause sealing problems.


And now place the lid on it! Fish one out of the pot (careful, the water is hot!) and place it over the opening.


Now take one of the seals out of the oven (also very hot!!) and screw it on loosely to "fingertip tight". It is very important not to screw it on too tightly. Basically as soon as you feel it resist a little it is good. Make sure it is on, just not too tight.


Place the rack onto the canner edges (so it is not completely submerged in the water) and put the jars on one by one as you fill them up. Repeat this until you have 7 full jars.


Now, carefully lift the handles of the rack off the edge and submerge the jars into the hot water. Make sure that each jar is covered by about one inch or more of water. If they are not, simply add some more hot water to the canner until they are all submerged. Put the lit back on and bring the water to a rolling boil. Once it is boiling, set the timer for 25 minutes ( you may need to adjust the time if you live at a very high elevation, which you would have to research). When the timer goes off, remove the jars very carefully from the canner (don't tip them!) and place them on a tea towel. You can suck up any water that is sitting on the tops of them by placing a corner of a towel on the lid and allowing it to absorb the water, but don't rub them or press on the lids in any way. 


Cover them all with another tea towel and leave them to sit for 24 hours. They should all be sealed by then, which you will be able to tell that the lids have sealed downward and do not pop when you run your fingers along them. If a jar has not sealed, place it in the fridge and eat it within a couple weeks. To get them ready for long term storage, remove the rings from the jars and wipe down the entire jar and ring to get rid of any sticky residue which could mould over time and destroy the seal. You can either store the jars with or without the rings, whichever you prefer. Make sure to label each jar with the contents and year you did them, and enjoy!

My canning shelf last year


I hope this was helpful and informative. If any of you have questions please leave a comment and I will do my best to answer them. Please let me know and I will do my best to answer them. And let me know if you tried it or how you can your fruit, I would love to get some feedback on this!

Happy Preserving,

Brenna

Wednesday, September 28, 2011

Warm Chocolate Pudding

Thank you to everyone who commented on my last post, I am feeling much better!

Tonight, I offer a recipe. Pudding was a staple dessert in my family growing up, probably because it contains nothing but pantry staples and is easy to make in large batches. There is nothing more comforting than a warm bowl of pudding on a cold night. I go back and forth between butterscotch and chocolate as my favourites. Tonight, chocolate won.


Chocolate Pudding

Serves 2 (or one if you are being indulgent)

2 cups milk or cream, whatever you have on hand
2 tbsp. cornstarch or flour ( I used gravy flour, a super fine flour made for thickening sauces)
1/8 tsp. salt
1/2 cup dark brown sugar
1/3 cup cocoa
2 egg yolks, beaten
1 tsp. vanilla

In a heavy bottomed pot, mix together flour, sugar, cocoa, and salt. Add half of the milk and turn on to medium heat. Slowly add the rest of the milk. Heat slowly to a boil, stirring constantly. Boil and stir for one minute. Slowly add a small amount of hot liquid to egg yolks, beating well. Add egg yolk mixture back into pot and bring up to a boil again, stirring constantly. Take off the heat and add vanilla. Strain if you desire ( I usually do as for some reason my egg yolks always leave a slightly grainy texture). Serve warm or chilled, however you like it.

Enjoy!

Brenna

Thursday, September 22, 2011

On My Mind

Joining in with Rhonda Jean today for another On My Mind Post. Today I am thinking about my diet and some changes that need to be made. I have had several days in the last few weeks with some bad stomach upset/pain, and I think I need to take a close look at my diet and what might be causing this.


I will be using these cookbooks a lot in the near future!


I am really at a loss as to what could be causing my discomfort. I do not have a history of troubles with certain foods in my family, and never have I had problems before. I have been eating out more than usual lately, so I am going to cut that out entirely and begin to start a food diary to see if I can pinpoint a certain food that is bothering me. I am going to stop eating anything that is not homemade or that I know all of the ingredients to and go from there.

Completely unrelated is a book I have placed on hold at the library. Nourishing Traditions. I realize that this book is completely against vegetarianism and promotes meat eating, but I am curious. I have read so many blog posts about this book (including over at Rhonda's), and I think that it is time I read it. No, I am not thinking about abandoning my vegetarianism, but I think it is imperative that I hear "both sides of the argument" in order to be fully educated in what I eat. I will let you know what I think when I have received and read it.

Have you ever had food intolerance concerns? What are your thoughts on your diet?

Brenna